In this post, I would like to introduce you to a (very) new framework for cross-platform mobile development called Flow. Typically, when you develop a native mobile application, you are required to maintain two separate codebases: one for iOS (Objective-C or Swift) and one for Android (Java). With Flow, the differences between these platforms are abstracted in a way that allows you to develop a single codebase, using RubyMotion, and support both platforms. Flow also allows you to write platform specific code when you need to. In this tutorial, we will build an app which displays data from an API which runs on both iOS and Android.
What is Flow?
Flow started as a set of cross-platform libraries for dealing with common tasks such as making HTTP requests, parsing JSON, etc. Rather than having to write platform specific code, you could use a Flow library that would work the same across platforms. Here’s a list of libraries that Flow currently includes:
Net- HTTP networking and host reachabilityJSON- JSON serializationDigest- Digest cryptographyStore- Key-value storeBase64- Base64 encoding/decodingLocation- Location management and (reverse) geocodingTask- Lightweight tasks scheduler
The one library that I didn’t mention is UI. It’s the biggest, and newest addition to Flow which takes Flow from a simple set of libraries to a full-on framework.
Building Cross-Platform User Interfaces
Inside Flow’s UI library is a set of individual UI components (things like labels, buttons, and inputs) that can be used for building user interfaces that work across both iOS and Android. Each of these Flow UI components delegate their behavior down to the native UI element that is specific to the platform that it is running on, but provide an identical API across platforms.
Flow’s UI framework borrows a few of its concepts from other projects. Flow uses the same layout engine as React Native. UI elements are positioned and styled in a way that is similar to using CSS. If you’re familiar with how CSS Flexbox works, then this will feel familiar to you.
Flow also borrows the concept of a “screen” from the ProMotion framework. A screen represents a “page” in an app which displays UI elements. In iOS, this would be called a UIViewController. In Android, this would be called an Activity. Most of your app will be composed of screens. Unlike ProMotion, Flow does not (as of yet) provide different types of screens (table screens, map screens, etc).
Getting Started with Flow
Let’s get stared using Flow. In order to use Flow, you will need to be using the latest version of RubyMotion (4.12). I’m also going to assume your iOS and Android environments are set up already. If not, read iOS Setup and Android Setup.
To get started, install the gem: gem install motion-flow.
Now that the gem is installed, a new motion template will be available to use. Let’s generate a new app:
$ motion create --template=flow MyEventsApp
    Create MyEventsApp
    Create MyEventsApp/app/android/main_activity.rb
    Create MyEventsApp/app/ios/app_delegate.rb
    Create MyEventsApp/config/android.rb
    Create MyEventsApp/config/ios.rb
    Create MyEventsApp/config/osx.rb
    Create MyEventsApp/Gemfile
    Create MyEventsApp/Rakefile
    Create MyEventsApp/resources/Default-568h@2x.png
    Create MyEventsApp/resources/Default-667h@2x.png
    Create MyEventsApp/resources/Default-736h@3x.png
You will see that the generator has created some sample files for us to get started. The first thing to notice is that your Rakefile will look like a normal Rakefile again. That’s because all of the RubyMotion project configuration has been moved to a config directory. Each platform now gets its own configuration file.
The next thing to notice is that each platform gets its own directory in app. This is your place to put platform specific code. It will only be included on each platform. For example, the generator has created an app_delegate.rb for iOS and a main_activity.rb for Android. Ignore the contents of those files for now, as they are not very useful. Let’s start writing some cross-platform code with Flow.
Displaying A Screen
Our app is going to display a list of events using data from Calagator.org. The first thing we want to do is create a “Screen” that will be displayed when we open the app. I like to organize these files in an app/screens directory. Create the following file in app/screens/events_screen.rb:
class EventsScreen < UI::Screen
  def on_load
    navigation.title = "Calagator"
  end
end
This screen simply sets the title in the navigation bar to display “Calagator”. We’ll add more to this later. However, we have not yet told our App Delegate/Main Activity that we want to display this screen. To do this, first update your app/ios/app_delegate.rb to the following:
def iOS?; true; end
def android?; false; end

class AppDelegate
  attr_accessor :window # required by UI::Application

  def application(application, didFinishLaunchingWithOptions:launchOptions)
    events_screen = EventsScreen.new
    navigation = UI::Navigation.new(events_screen)
    flow_app = UI::Application.new(navigation, self)
    flow_app.start
  end
end
The code initializes a Flow UI::Application, with a navigation bar, with our new EventsScreen as the root. Note the two helper methods defined at the top. Those will be useful later in this tutorial.
Now update your app/android/main_activity.rb to the following:
def iOS?; false; end
def android?; true; end

class MainActivity < Android::Support::V7::App::AppCompatActivity
  def onCreate(savedInstanceState)
    super
    UI.context = self
    events_screen = EventsScreen.new
    navigation = UI::Navigation.new(events_screen)
    flow_app = UI::Application.new(navigation, self)
    flow_app.start
  end
end
This code does essentially the same as the iOS counterpart, except that it also sets Flow’s UI.context to be that of the main activity. Also notice that we are extending from a different base class. This may be fixed in future versions of Flow.
Now we have enough code to run our app in the simulator. To run the app in the iOS simulator, run rake ios:simulator. To run the app in the Android emulator, rake android:emulator. In addition to these two options, Flow comes with a new Rake task that will allow us to run both the iOS simulator and Android emulator simultaneously. This new task is called super_repl. To run this, type rake super_repl. If your environment is configured correctly, you will see the output from both apps building and running. You can even execute code in both apps at the same time using this combined REPL.
Your First Cross-Platform API Request
Our app is going to display a list of events that we fetch from a remote API. Let’s start by building a class that we will use for fetching our events. I like to organize my models in a models directory. Create this file in app/models/event.rb:
class Event
  def self.all(&callback)
    Net.get "http://calagator.org/events.json" do |response|
      if response.status == 200
        callback.call(response.body)
      else
        callback.call(nil)
      end
    end
  end
end
Using Flow’s Net library, we define a method that makes an HTTP request to fetch the events JSON that we will use to display the events. The request will automatically run asynchronously, so our method takes a callback block that we will use to return the results of the HTTP request once the response has been received. Here is an example of how we will use this:
Event.all do |events|
  puts "Received Events: #{events.inspect}"
end
Now if you run this code in the Android emulator, you should see the events logged to the console. If you try to run it in the iOS simulator, you will see an error regarding App Transport Security.
iOS 9 App Transport Security
If you tried running the example above, then you might have seen this error in the console:
App Transport Security has blocked a cleartext HTTP (http://) resource load since it is insecure. Temporary exceptions can be configured via your app’s Info.plist file.
This is because the URL that we used (http://calagator.org/events.json) uses HTTP, not HTTPS. iOS 9 introduced a new feature which is intended to protect users from insecure data transfer. Since we are only fetching data, and not submitting data, it is okay for us to use insecure HTTP in this case. To fix this issue, we need to configure our app to allow us to connect over HTTP. Add this line to your config/ios.rb file to allow connecting to any URL over HTTP:
Motion::Project::App.setup do |app|
  app.name = 'calagator'
  app.info_plist['NSAppTransportSecurity'] = { 'NSAllowsArbitraryLoads' => true }
end
In a real app, you might want to configure specific domains instead of allowing all HTTP URLs, but this is the easiest thing to do in our case.
Displaying a List of Events
Now that we know how to fetch data, we can learn how to display data. Flow provides a UI element called a List. The iOS equivalent is called a UITableView. A Flow UI::List displays a list of UI::ListRow instances. Let’s start by creating the row class that represents a single event from Calagator:
# app/views/event_row.rb
class EventRow < UI::ListRow
  attr_accessor :title_label

  def initialize
    self.padding = [10, 10, 10, 10]
    add_title_label
  end

  def update(data)
    title_label.text = data["title"]
  end

  def add_title_label
    self.title_label = UI::Label.new
    font_name = iOS? ? "Helvetica" : "Roboto-Regular"
    title_label.font = { name: font_name, size: 18 }
    add_child(title_label)
  end
end
In this example, our EventRow has a single label for displaying the title of the event. When the update method is called, we expect to receive a hash of the event data so that we can set the text of our title label. We also specify a platform-specific font name using our helper method we defined earlier.
Now let’s create a list that will display our new EventRow:
# app/views/events_list.rb
class EventsList < UI::List
  def initialize
    super
    self.flex = 1
    render_row do
      EventRow
    end
    load_events
  end

  def load_events
    Event.all do |events|
      self.data_source = events
    end
  end
end
Here we have subclassed the UI::List class to customize our own list. First we define an initialize method that immediately calls its super class implementation. Next, we specify that our layout will use Flexbox. This means that all of our rows will automatically be resized to display all of their content. The next bit of code looks a little strange. We call a render_row method which accepts a block which will be called whenever the list needs to know the type of class to initialize for the given row index. Since all of our rows will be the same, the only thing we do in this block is return EventRow to specify that we want all of our rows to be an instance of EventRow. Lastly, we move our API request code into this class and make our API request as soon as the EventsList is initialized. When the response is returned (and our callback block is called) we receive our events data and set it as the data source. This data source will be used to determine how many rows to display in our list. Remember that our API request is happening asynchronously so the list will display blank for a short period of time until the API request has returned a response.
Now we can update our screen class to add our list to the view:
# app/screens/events_screen.rb
class EventsScreen < UI::Screen
  def on_load
    navigation.title = "Calagator"
    view.add_child(EventsList.new)
    view.update_layout
  end
end
Now if you run the app in the simulator/emulator, you should see a list of events!
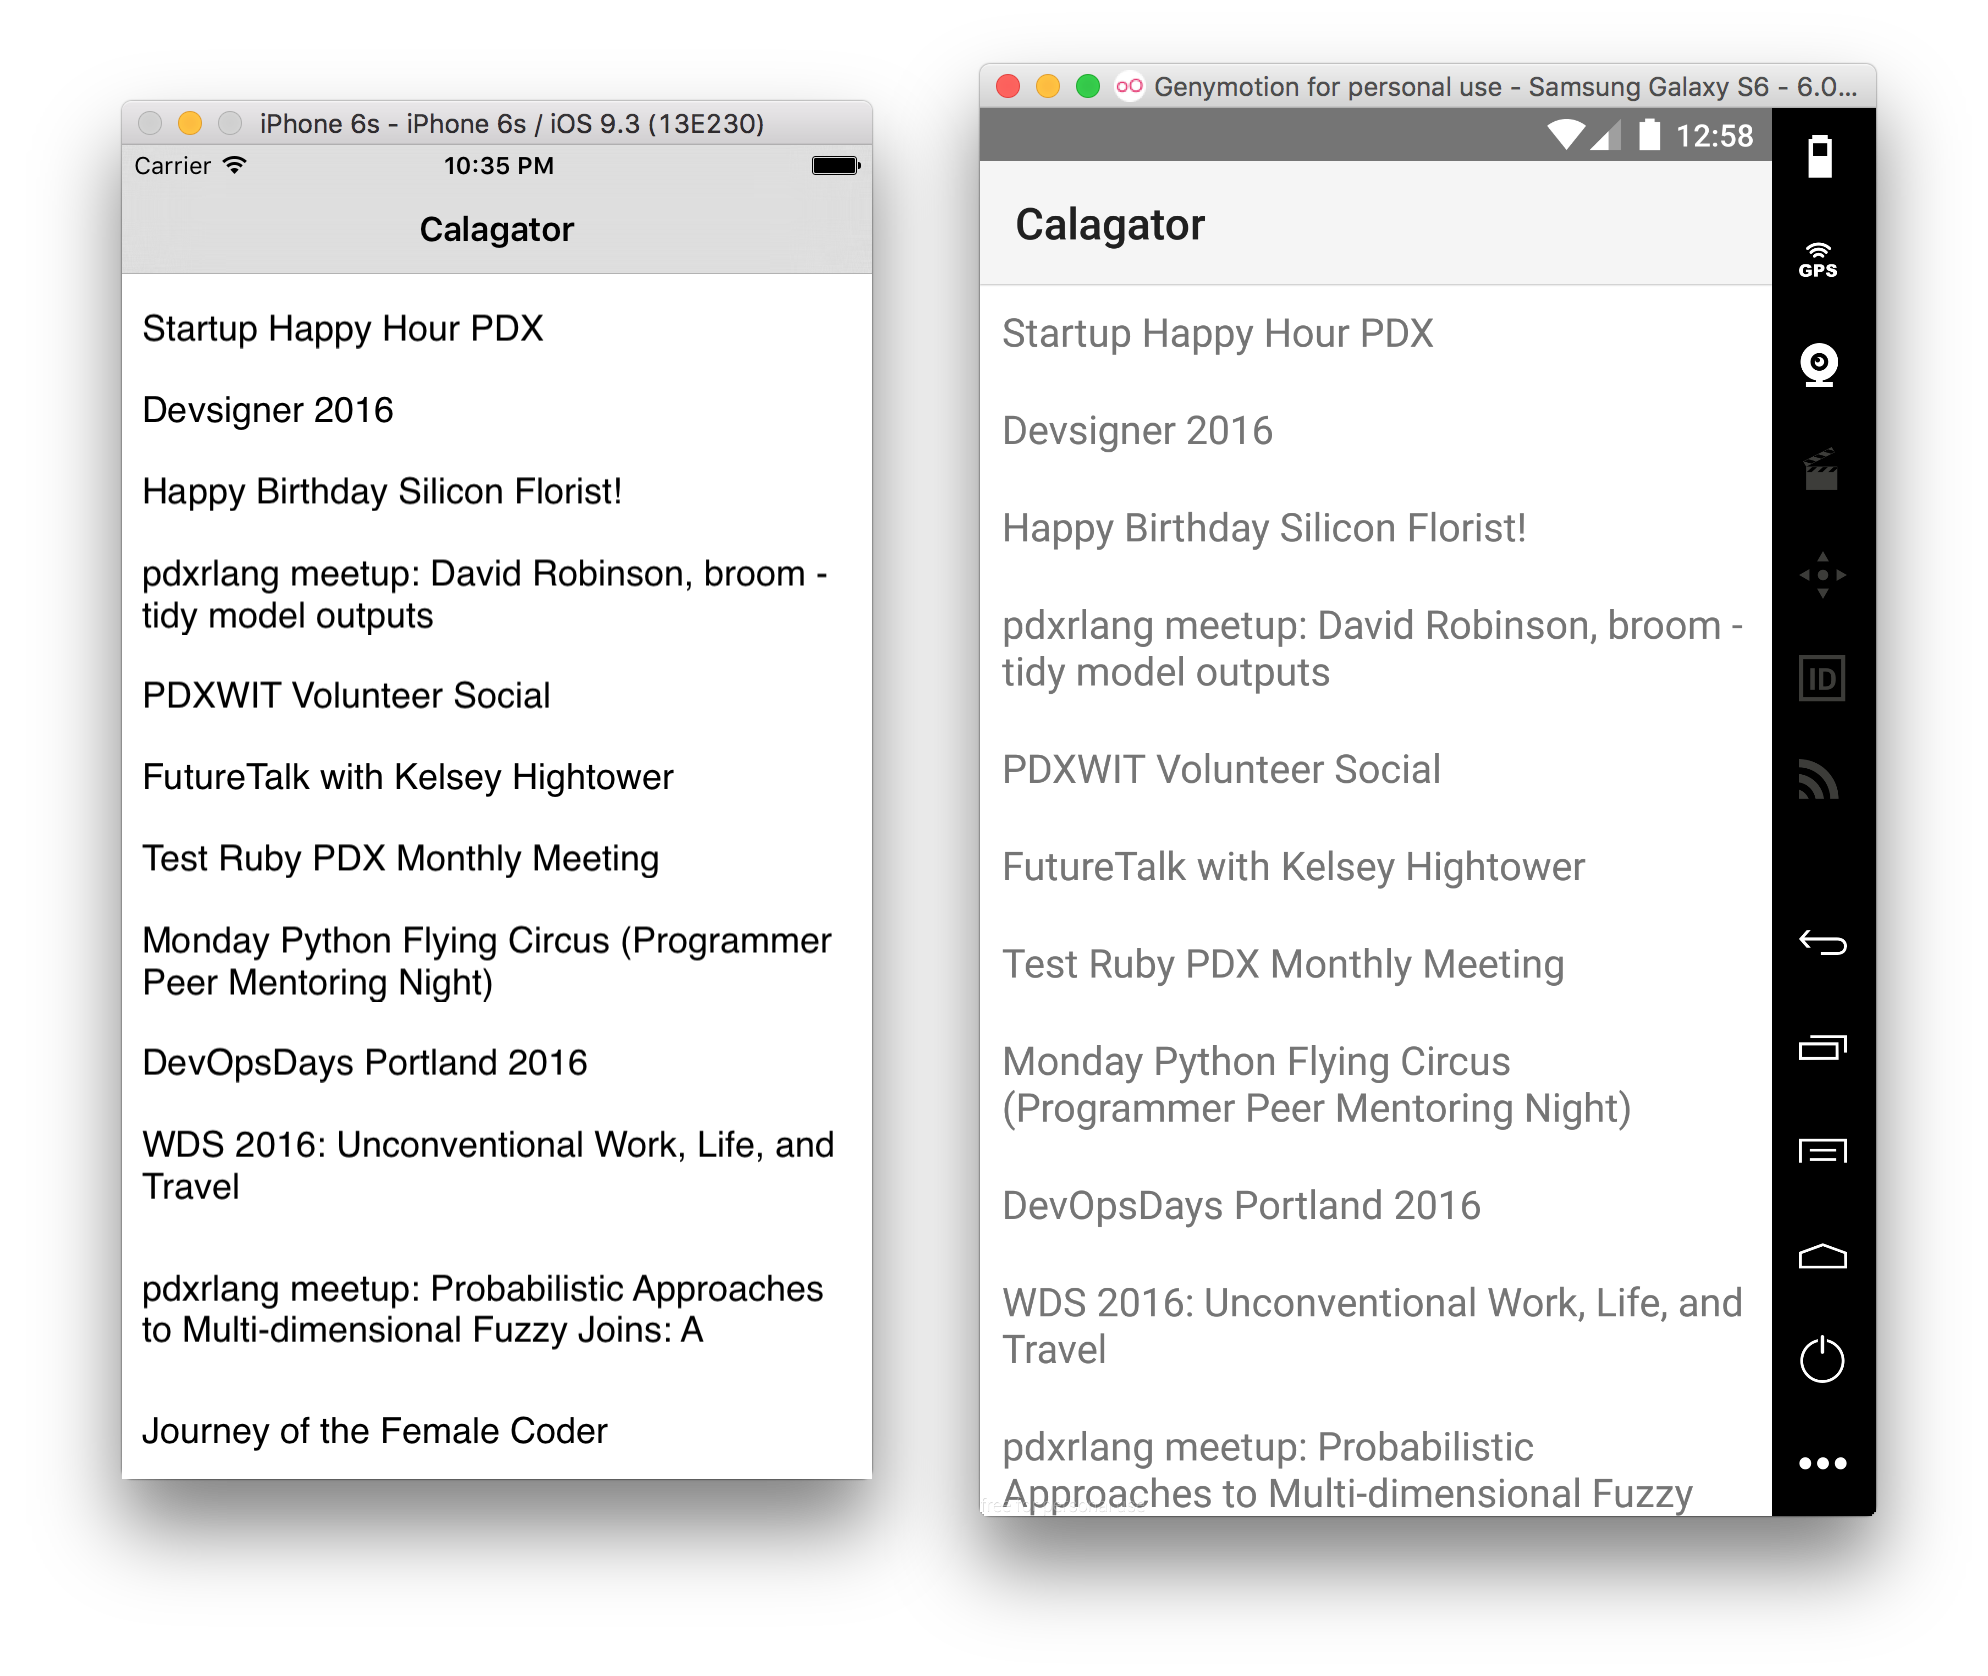
We’ve only scratched the surface of building apps with Flow.
If you ran into any issues in this tutorial, feel free to post in the comments or find us on Slack. You can find a repository with this code and more additions here: https://github.com/motionpdx/calagator2
Follow us for more tutorials on Flow and other RubyMotion related topics!